The best way to use Surfshark with xCloud is by connecting to a VPN server in one of the gaming service’s approved regions before launching the cloud service.
That way, you can access geo-blocked services and enjoy DDoS protection on P2P titles like Starfield, Halo Infinite, and Tom Clancy’s Rainbow Six.
And, in some cases, Surfshark will even help you bypass ISP throttling.
Read on to see how to use your PC, phone, and game console to join lag-free, live battles in Fortnite, Age of Empires, and more on xCloud!
How to Use Surfshark With xCloud on Computers?
Use Surfshark’s privacy-friendly RAM-only servers with xCloud on computers by downloading the correct VPN app to your device.
Here’s how I set up Surfshark for xCloud on my Windows laptop:
- Grab this exclusive Surfshark deal for savings on your first account.
- Click “Get Surfshark.”
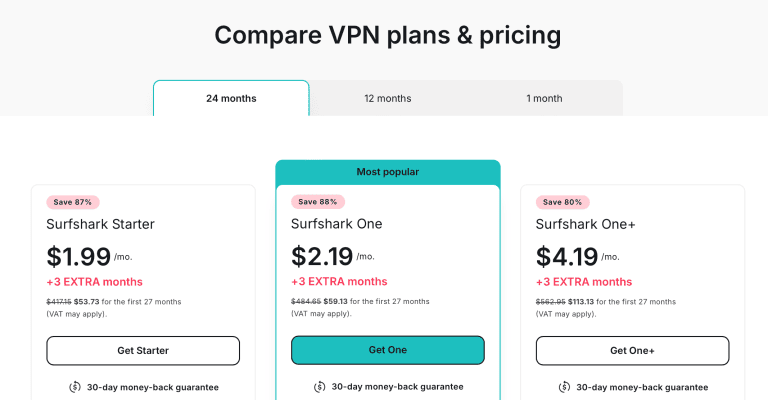
- Choose a plan.
- Enter your email address and complete the payment process.

- Log in to your Surfshark online account.
- Click “Apps & extensions.” Then, click the download link.

- Create a Microsoft account if you don’t already have one. Note your login details.
- If Microsoft services aren’t available in your region (like Cuba and Nigeria), jump to steps 12-14 now to bypass this block using a VPN server in a Microsoft-friendly location. Then proceed with step 8.

- Open the BETA Xbox Cloud Gaming portal and sign in using your Microsoft account credentials.

- Click “GET GAME PASS ULTIMATE.”
- Click “JOIN NOW.” Enter payment details and complete the purchase.

- Sign out of the Xbox Cloud Gaming portal before continuing the rest of the steps.
- Launch the Surfshark app and log in using the verification steps. You can skip steps 12-14 if you’re already connected to a Surfshark server.
- Click the settings icon and enable the Kill Switch to prevent DNS leaks and DDoS attacks on vulnerable xCloud games like GTA5 and Minecraft Legends.

- Click “VPN” and connect to a server in an area where Xbox Cloud Gaming is supported. For example, you can choose servers in the US, UK, Canada, Brazil, Netherlands, Germany, Argentina, Switzerland, Sweden, Spain, Ireland, and Poland. I chose Finland for this unblocking demo.

- Use Google’s Incognito Mode or clear your browser cache before signing in to the Xbox portal using the same Microsoft account credentials.

- Plug your Xbox controller into your PC’s USB port or connect via Bluetooth.
- Choose from hundreds of console games on your PC! Here, I am swindling my way through Sea of Thieves on my laptop from South Africa, where xCloud is blocked!

- Interestingly, now you can turn off the VPN connection and continue playing xCloud from anywhere. This method lowers ping for smooth live gaming but removes VPN protection!

How to Use Surfshark With xCloud on Smartphones?
The steps to use Surfshark with xCloud on smartphones are similar to the PC setup.
Here’s what you must do:
- Get an unbeatable Surfshark deal to save on your first account.
- Download the app to your smartphone via the Google Play or Apple App Store. I’m using my Android device for this demo.

- Create a Microsoft account if you don’t already have one.

- Go to Xbox.com and sign in with your Microsoft credentials. Follow the steps to get an Ultimate Game Pass. Skip this step if you already have an Ultimate Game Pass!

- Launch your Surfshark app and click Settings > VPN Settings to enable the Kill Switch (optional).

- Connect to a server. My choice was Canada due to its recommendation for fast speeds.

- Return to Xbox.com and refresh the page or sign in if required. Click “CLOUD GAMING BETA” to play a game immediately, or select the option to download the Xbox app to your phone.

- Connect your Xbox controllers to your phone to play unblocked titles like Tomb Raider and Dune, or choose a touchscreen game like Fable 2 to play xCloud without controls.
- You’ve bypassed Xbox Cloud Gaming geo-restrictions! Play from anywhere!

How to Use Surfshark With xCloud on Smart TVs and Xboxes?
There are three ways to use Surfshark with xCloud on Smart TVs and Xboxes: the router method, via a virtual router, or using Smart DNS.
Before choosing any of these methods, create a Microsoft account and grab an Ultimate Game Pass (via your PC) by following the steps above.
Surfshark Virtual Router Setup for xCloud
The virtual router method only works through Windows PCs. If you have one, do these:
- Get a Surfshark subscription. You should grab these deals if you like savings.
- Download the Surfshark Windows app.
- Configure your PC into a VPN hotspot. You can watch the video below to do so.
- Launch your Surfshark app and connect to a server in an xCloud-supported region. I recommend UK-London, US Chicago, and Australia.
- Connect your TV or Xbox to the VPN Wi-Fi hotspot you created via your PC.
- Download the Xbox app to your Smart TV. Note that this option is only available on Samsung Smart TVs from 2021 until now.

- Alternatively, launch the Game Pass on your Xbox console.
- Log in using your Microsoft account credentials.
- Connect your Xbox controllers to your TV or console. You can get some insights from the video guide below.
- Game away!
Surfshark Router Setup for Playing xCloud Games
If you have a compatible Surfshark router running firmware like Tomato, DD-WRT, Synology, NAS, Sabai, Linksys, or Asus, you can also choose a router setup to play xCloud with Surfshark on your Smart TV or Xbox.
Here’s how I set up my Asus router with Surfshark for this purpose (the steps for most routers are similar):
- Not yet a Surfshark subscriber? You’re in luck with these discounts.
- Follow our dedicated Surfshark router setup guide to install the VPN on your compatible router.
- Connect your TV or game console to the Surfshark-enabled router network. You can choose Wi-Fi or ethernet cable connections and still get the VPN on your TV this way.
- Download the Xbox Cloud Gaming app. You should find this in your Samsung TV’s app store, but it comes pre-installed on your Xbox.
- Log in to the app using your Microsoft credentials.
- Connect your Xbox controllers via Bluetooth or USB.
- Enjoy Minecraft without DDoS fears, bypass geo-blocking to Remnant from the Ashes in regions like China, and evade ISP throttling if you want to enjoy a lag-free Battlefield for hours.
Surfshark Smart DNS Setup for Xbox Cloud Gaming
Another way to enjoy Xbox Cloud Gaming on your smart TV and unblock cloud games on your Xbox with Surfshark is to use the VPN’s Smart DNS feature.
The biggest benefit to this method is its lack of encryption, meaning you get the full blast of your gaming speed. However, this also means your activities aren’t hidden like over a VPN.
If you don’t mind that, follow the steps below:
- You’ll need an active Surfshark subscription. Get it cheaper with these discounts.
- Log in to your Surfshark web account.
- Click VPN > Manual Setup > TV or console.

- Click “Activate” to enable Surfshark Smart DNS.
- Note the DNS addresses generated for your devices.
- Change your smart TV’s DNS settings to the ones provided by Surfshark. I’ve added a video guide below to help you.
- You can also change the smart DNS on your Xbox console if that’s what you’re unblocking Cloud Gaming over.
- Restart your smart TV or Xbox for the new DNS changes to take effect.
- Securely play Assassin’s Creed from anywhere on xCloud with the fastest gaming speeds.
Jam Xbox Cloud Games With Surfshark Anywhere!
My setups show you can use Surfshark with xCloud, also called Xbox Cloud Gaming (Beta), from anywhere.
The best part is that the VPN can be used on all xCloud-supporting devices, including Xboxes, PCs, Smartphones, and Smart TVs.
So, why not get Surfshark risk-free for xCloud now and lose yourself in simulation games like Sims 4 or play FIFA23 for a soccer rush?


