If you’re looking for a way to install NordVPN on macOS on your Apple devices, you’re in luck.
You can directly install NordVPN on macOS via the NordVPN IKEv2 app version for macOS from the App store or via NordVPN’s website.
Alternatively, you can download the NordVPN OpenVPN application directly from the NordVPN official site and install it on your macOS device.
In this article, I’ll show you how to download and install your preferred NordVPN version on macOS quickly.
Step-By-Step Instructions to Set Up NordVPN on Mac
There are two options for setting up NordVPN on Mac:
- Method 1: Installing the NordVPN IKEv2 application on macOS
- Method 2: Installing the NordVPN OpenVPN application on macOS
Let’s dive into the two options.
Method 1: Installing the NordVPN IKEv2 Application on macOS
The IKEv2 NordVPN application is compatible with macOS 10.12 and later versions.
It uses the fast and reliable IKEv2/IPSec protocol, which doesn’t compromise on security and privacy.
Follow the steps below to set it up.
- First, get this NordVPN subscription deal!
- When done, navigate to the NordVPN member area and Log in. The login button is available at the top-right corner.

- Type your username or email in the window that opens and click “Continue.”

- Type in your password and hit “Log in.”

- You should be able to access your NordVPN dashboard now.
- Click on Download Apps.

- Find “Download NordVPN for macOS” on the next page and download it.

- Depending on browser settings, you might be asked for permission to access App Store. Grant the permission or click on “Open App Store.”
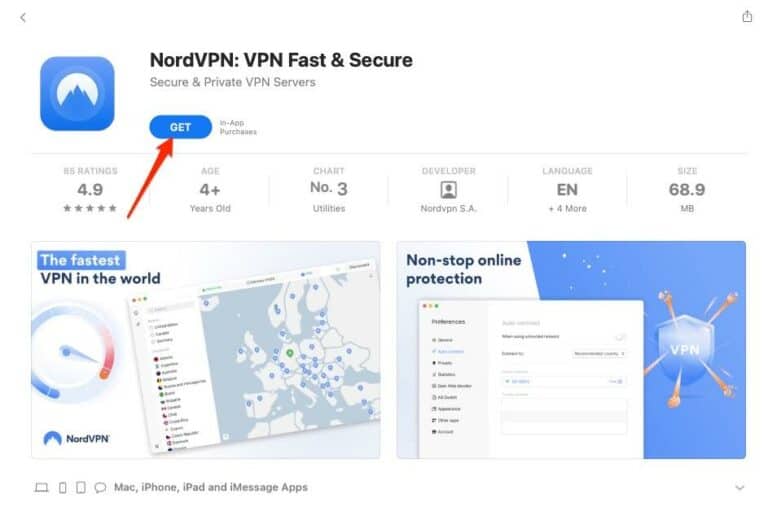
- You will be directed to the NordVPN app on the app store. Click the “GET” button to download it.
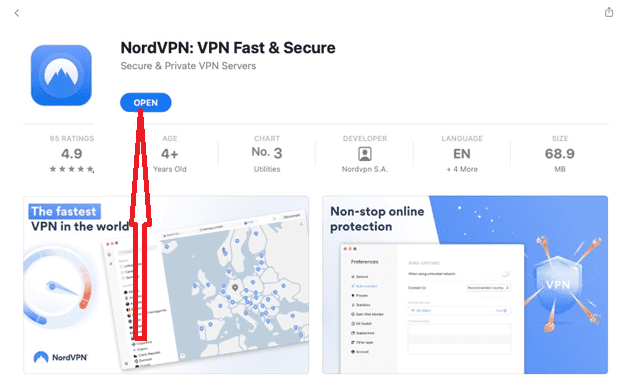
- The preceding process will download and install the NordVPN for macOS automatically on your Mac. Click OPEN to launch it.
- In the privacy agreement that pops up, click on either “Agree to all” to give it all permissions listed or the “Agree to required” option to give only specific permissions.

- After that, click on the login button in the next window.
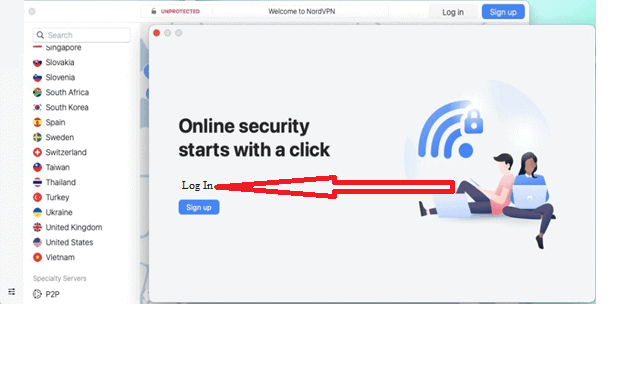
- You’ll be redirected to the NordVPN official website. Log in with your details.

- The browser will ask for permission to open the NordVPN application. Grant it.

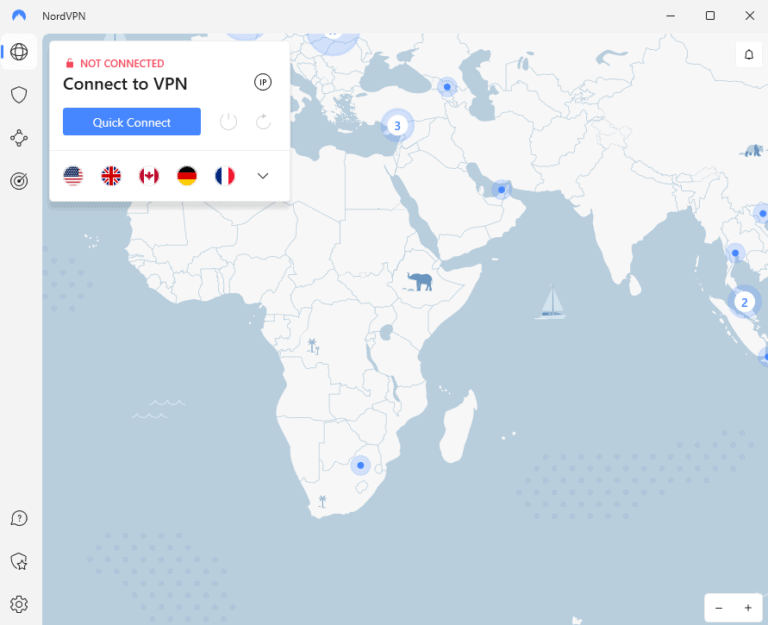
- You’ll be logged in to the NordVPN app for macOS. Now, click the Quick Connect button on the top right-hand corner to connect to the nearest/fastest NordVPN server.
- You might get a warning message next, click ”Got it.”

- The app will preview a notification requesting permission to add VPN Configurations. Hit “Allow.”

- The app will connect to the nearest server location. If you have a preference, double-click on the location to connect to the server. For example, connect to a US location to stream US Netflix.

- Your status will turn to CONNECTED, meaning your connection is now secure.

That’s how to download, install, and use NordVPN on macOS. Enjoy.
Method 2: Installing the NordVPN OpenVPN Application on macOS
Want the NordVPN OpenVPN application version instead? Here’s how to get it up and running on your macOS device.
- Purchase a NordVPN subscription.
- Download the OpenVPN version of NordVPN for macOS.

- Navigate to the Downloads folder on your Mac device and locate the file NordVPN.pkg. Click on it.

- A prompt will pop up requesting permission to install “Helper.” The tool is used to create secure VPN tunnels. Enter your device’s password and hit OK to confirm/or use your fingerprint on relevant Mac models.
- A new window directing you through the installation process will pop up. Click “Continue.”

- Next, Hit “Install.”

- A message will appear confirming that the application was successfully installed. Close the window.

- Launch NordVPN by clicking on its “icon.”

- Log in to your account with your email and password. The login button is on the top right-hand corner of your screen.

- On the pop-up window, click “Open NordVPN app” and check the box “Always allow nordaccount.com to open links of this type…”

- You’ll be taken to the NordVPN dashboard.

- On the top right-hand side is a “Connect” button that will automatically connect you to a server recommended by NordVPN’s smart algorithm.

- OR click on the “Search…” field in the top-left corner and type the country or location that you want. In this case, let’s connect to Canada.

- Enjoy the web privately and securely.
What Is the Difference Between IKEv2 and OpenVPN NordVPN Versions for macOS?
The OpenVPN Mac app version uses SSL/TLS to secure data at the Transport level, while the IKEv2/IPSec variant secures data at the IP level. OpenVPN is also comparatively challenging to set up, but it’s a better option if you’re up against firewalls.
Likewise, it can run on any port and uses both TCP and UDP protocols.
So if privacy is an issue for you, OpenVPN helps against the prying eyes of ISPs, advertising agencies, hackers, and government regulators.
The table below presents the key differences between these versions at a glance.
| Criteria | IKEv2 NordVPN Version | OpenVPN NordVPN Version |
|---|---|---|
| Installation Source | Apple Store | NordVPN’s official website |
| Meshnet | Yes | No |
| Custom DNS servers | Yes | No |
| Threat Protection | Yes | Yes |
| Speed | Very fast (up to 600Mbps) | Fast (up to 400Mbps) |
| Kill Switch | Yes | Yes |
| Supported firmware | No older than 10.12 | Can run on earlier versions of macOS (no older than 10.10) |
| Dark Web Monitor | Yes | Yes |
What Do You Get on the NordVPN macOS Version?
Besides pushing all the right buttons in key areas of security, speed, and privacy at hard-to-beat prices, NordVPN has a few other unique features. They include:
- Double VPN. Instead of just encrypting and re-routing your traffic once, Double VPN repeats the process, sending your request through two servers and encrypting it with separate keys at each one.
- Obfuscated servers. NordVPN’s obfuscated servers can prevent ISPs from knowing that you’re using a VPN. However, this impacts your internet connection speeds more than the regular VPN protocol.
- Threat Protection. The Threat Protection function prevents access to websites known to contain malware or phishing schemes and blocks malicious ads from loading too.
- Kill Switch. NordVPN features two kill switches. The first one terminates your internet connection when you’re randomly disconnected from a VPN server. The second allows you to designate which applications should be disabled in the case of an internet connection drop.
- Onion Over VPN. NordVPN’s Onion Over VPN feature gives you all the Onion network’s benefits without downloading Tor. Therefore, no snoopers can track what you’re doing, and no Onion servers can realize who you are.
- Dark Web Monitor. The tool searches the internet for credential leaks linked to your NordVPN email account and notifies you in the case of any account breaches/leaks.
Why Won't NordVPN Connect on My Mac?
Here are common issues/fixes if your NordVPN isn’t connecting on your Mac:
- Check Your Internet Connection. Ensure you have a working internet connection before connecting to NordVPN. Otherwise, restart your router, and reconnect to your Wi-Fi network or the Ethernet cable. If that doesn’t work, contact your ISP.
- Switch Servers. If a server is congested, it may reject new connections. Reconnecting to a different server may solve the problem.
- Change Protocols. Some NordVPN connectivity issues on Macs may be due to app configurations. Try changing from one option to another. There are 3 options to choose from: OpenVPN(TCP), OpenVPN(UDP), and NordLynx. I recommend NordLynx as it offers, by far, the best connection speeds while maintaining security.
- Disable Antivirus. Disable any antivirus or firewall software as it may interfere with VPN connections.
- Check if You Have the Right Ports Opened. Your provider can block traffic on a specific port. Try changing your default port settings to see if the right ports are open for a VPN. The 1194 UDP and 443 TCP ports must be open on your routers for NordVPN to work.
- Speak With Customer Support. If the methods above don’t help, contact customer support and inform them of your concerns. NordVPN’s live chat support is available 24/7, so you can reach them anytime.
FAQs
Why Is the NordVPN Application Not Opening on macOS?
If you have the NordVPN application installed but can’t get it to run, try to reset the NordVPN application, restart your computer, reinstall the application or add exceptions for the NordVPN app on your antivirus software.
How Do I Download NordVPN on Mac Without App Store?
You can download NordVPN for Mac directly from the NordVPN official site.
You can also request and access NordVPN mirror websites to download the app from oppressive regimes like China and Russia which may block VPN website access.
Does NordVPN Work With Safari?
NordVPN works with Safari through its macOS and iOS apps.
Thus, you get the VPN provider’s top-level encryption, ad-blocking tech, and reliable unblocking on all websites visited via the Safari browser.
Conclusion
Congratulations!
You’ve successfully installed, completed the setup, and connected NordVPN on your Mac. Hopefully, the process was quick and easy.
If you’re still unsure on getting NordVPN, I’ll say go for it now.
Don’t forget to save more on your first purchase using our NordVPN discount offers.
The best part is you can ask for a refund of your subscription amount within 30 days, and you’ll get it without questions.


