The fastest and easiest way to set up NordVPN on Ubuntu is by installing the VPN’s native application via your Ubuntu Linux terminal. Alternatively, you can set up NordVPN on Ubuntu via the Linux distro’s Network Manager or use an OpenVPN client.
Each setup method offers varying functionalities and technicalities for different Ubuntu users.
Below, I’ll share easy stepwise guides to install NordVPN on Ubuntu via these methods. That way, you can choose the one that best suits your technical understanding of the operating system.
How to Install the NordVPN App on Ubuntu?
NordVPN’s native Ubuntu app is installed and operated via the Linux distro’s terminal.
Thankfully, you don’t have to create the terminal entries from scratch.
Let me show you how to set this up:
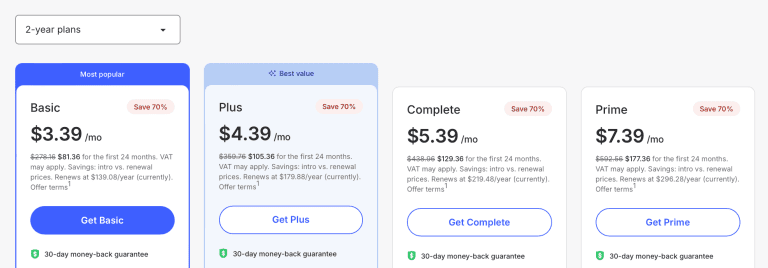
- Get your NordVPN account. Grab these discount offers for savings.
- Search for “terminal” from your Linux apps. Click to launch it.

- Update your Ubuntu by running the command below. Not doing this might affect your installation later.
sudo apt update

- Run the command below to upgrade your Ubuntu. This might take a while.
sudo apt upgrade

- Clear the screen after downloading if you like a clean workspace. Ctrl + L does this for me. Otherwise, skip to the step below.
- Run the command below to download the NordVPN app to your Ubuntu via the terminal.
wget -c https://repo.nordvpn.com/deb/nordvpn/debian/pool/main/nordvpn-release_1.0.0_all.deb

- Check the file you just downloaded by running the command below.
ls

- Copy the text highlighted in red after the code runs. In my case, that’s:
nordvpn-release_1.0.0_all.deb

- Go to the next terminal line and paste the command below. Don’t run the command yet.
sudo dpkg -i
- Then, paste the text you copied in step 8 above in front of the new command line.
sudo dpkg -i nordvpn-release_1.0.0_all.deb
- Press Enter. This will add the NordVPN repository files to your Ubuntu.
- Once done, update the NordVPN app. Repeat step 3 to get this done.
- You can clear your screen after this stage before moving to the next installation phase.
- Install NordVPN by entering the command below.
sudo apt install nordvpn

- If you follow all the steps correctly, you’ll get a “NordVPN for Linux successfully installed!” message.

- Repeat step 5 to clear your screen again. Then, log in by entering the command line below.
nordvpn login
- Optional: If you get the error message [Permission denied accessing /run/nordvpn/nordvpn.sock], run the command below, then restart your Ubuntu system. Otherwise, skip to step 19.
sudo usermod -aG nordvpn $USER

- Run the command in step 16 again to log in to NordVPN.
- Copy the link and open it in your preferred Ubuntu browser to access the NordVPN login page. I’ll use Firefox for this example.

- Enter your username, then click “Continue.”

- Enter your password, then click “Log in.”

- Click “Continue,” then “Open Link” in the browser prompt that appears. This launches your terminal, where you operate the NordVPN app.

- Enable the NordVPN kill switch by entering the command below. This ensures your Ubuntu system’s IP address doesn’t leak to peers, your ISP, or other third parties if NordVPN accidentally disconnects.
nordvpn set killswitch on
- Choose a suitable NordVPN connection protocol. I recommend UDP – the faster OpenVPN protocol – which you can connect to via the command line below.
nordvpn set protocol udp

- Enter [nordvpn connect] to connect to the fastest or closest available server. This is your best bet for the fastest connection.

- Alternatively, check the NordVPN-Ubuntu command lines in the section below to connect to a country server, get a specific city server within a country, or enable other settings.
NordVPN Ubuntu App Commands to Know
The NordVPN Ubuntu app doesn’t have a graphical user interface that allows you to connect/disconnect servers or tweak settings. Instead, you must use the app from within your Ubuntu terminal.
Fortunately, you don’t have to memorize all the NordVPN Ubuntu app commands since you can access them all via the simple command below.
man nordvpn

Here are the top picks to remember and how to use them in the app.
| Command | Alternate Command | Function |
|---|---|---|
| nordvpn login | - | Login |
| nordvpn connect | nordvpn c | Quick Connect |
| nordvpn disconnect | nordvpn d | Disconnect from server |
| nordvpn set killswitch on | - | Enable kill switch |
| nordvpn set killswitch off | - | Disable kill switch |
| nordvpn countries | - | See available country servers |
| nordvpn cities | - | See available city servers |
| man nordvpn | - | See all commends in terminal |
How to Setup NordVPN on Ubuntu via the OpenVPN Client?
The NordVPN OpenVPN CLI setup is preferred by Ubuntu users who want a more hands-on approach to their VPN setup. However, this method leaves you without access to NordVPN’s Meshnet, Kill Switch, and specialty servers.
If you don’t mind that, here’s what to do:
- Get your NordVPN account. You’ll need these discounts for savings if it’s your first time.
- Launch your Ubuntu terminal.
- Disable IPv6 on your Ubuntu.
- Run the command line below in the terminal.
sudo nano /etc/sysctl.conf

-
- Type your password, if prompted, then press Enter. Note that the cursor won’t indicate that you’re typing, but the terminal recognizes the input.

- Add the command lines below to the end of the conf file you’ve summoned.
					net.ipv6.conf.all.disable_ipv6 = 1
net.ipv6.conf.default.disable_ipv6 = 1
net.ipv6.conf.lo.disable_ipv6 = 1
net.ipv6.conf.tun0.disable_ipv6 = 1

-
- Save and exit the terminal. My keyboard shortcut for this is Ctrl + X, but yours may differ.
- Restart your Ubuntu system.
- Relaunch the terminal.
- Enter the command line below to install the OpenVPN client.
sudo apt-get install openvpn
-
- Even if you’ve installed the client, rerun the command line to get the latest version.

- Enter your password if prompted, then click Enter to complete the installation.
- Go to the OpenVPN configuration directory by running the command below. This way, all commands you run now execute in the directory.
cd /etc/openvpn

- Run the command below to download the OpenVPN configuration files to the chosen directory.
sudo wget https://downloads.nordcdn.com/configs/archives/servers/ovpn.zip

- Optional: Run the command below instead if you get a certificate not trusted error.
sudo apt-get install ca-certificates
- Optional: Run the command below if you don’t have an unzip package on your Ubuntu. This is needed to unpack the file we downloaded in step 8.
sudo apt-get install unzip

- Once unzip is downloaded or confirmed, run the command line below to unpack the package downloaded in step 8.
sudo unzip ovpn.zip
- NordVPN’s OpenVPN server list will now be unpacked into your terminal.

- Run the command line below to remove files you no longer need.
sudo rm ovpn.zip
- Launch the directory where the NordVPN OpenVPN servers are unpacked. You can run the commands below to get the UDP (faster) or TCP (more stable) OpenVPN servers.
- For UDP:
cd /etc/openvpn/ovpn_udp/
- For TCP:
cd /etc/openvpn/ovpn_tcp/

- Once you’ve chosen a directory, run the command below to see all the servers in that directory. I’m using the faster OpenVPN (UDP) option for this tutorial.
ls -al

- Choose a server you want to connect to from the list and copy its address. Below, I’ll show you how to find and connect to the NordVPN recommended server. For now, I’ll connect to a US server [us9963.nordvpn.com.udp.ovpn].

- Run the command line [sudo openvpn_copied server address]. In my case, the command will be:
sudo openvpn us9963.nordvpn.com.udp.ovpn

- Fill in your NordVPN service credentials username, then press Enter.
- Jump to the subsection below for steps on getting your NordVPN service credentials.

- Supply your NordVPN service credentials password, then press Enter.
- You’ll get the “Initialization Sequence Completed” message on a successful connection!

- You can test for leaks to be sure. I used www.ipleak.net, and I got a US IP address back!

- Use public Wi-Fi networks without losing sensitive data, unblock geo-restricted streaming content, and play Ubuntu games securely under your NordVPN OpenVPN connection.
How to Get NordVPN Service Credentials?
Your NordVPN service credential is a username and password different from the email/password combo you signed up with. These service credentials can only be used for manual configuration setups, not to log into your NordVPN client dashboard.
Here’s how to get the service credentials:
- Go to the NordVPN login page.
- Log in with your email and password combination.

- Click “NordVPN.”

- Scroll to the bottom of the page and click “Set up NordVPN manually.”

- Verify your email address by entering the code NordVPN sends to your email address.
- Copy the unique username and password generated by NordVPN. These are your service credentials.

How to Get Your NordVPN Recommended OpenVPN Server?
The NordVPN recommended server is often the fastest or closest server to you. NordVPN’s systems have decided that this server will offer you the best performance (speed + security).
So, here’s how to find and connect to it via the OpenVPN Client.
- Go to the NordVPN server tools page.
- Copy the server address you get (it looks like a URL). Mine is for Portugal.

- Paste the copied address in a text editor.
- Add a [.udp.ovpn] or [.tcp.ovpn] suffix (without the brackets) to the address, depending on the OpenVPN protocol directory you’ve opened in your terminal.

- Copy the full address.
- Continue with steps 17-22 in the main setup guide above to connect to this server.
How to Setup NordVPN on Ubuntu via the Network Manager Client?
The Ubuntu Network Manager provides the closest thing to a GUI for NordVPN. Still, without all the functionalities you get with the terminal app setup.
It’s also an upgrade over the OpenVPN client setup since you don’t need to manually copy and paste server addresses in the terminal every time.
Let me show you how:
- Got your NordVPN account handy? Use these discounts for savings.
- Download the NordVPN OpenVPN configuration files.

- Open your Ubuntu downloads folder. That’s “Downloads,” in my case.
- Right-click the downloaded file and extract it to a preferred folder. I’ll choose “Extract Here” for this demonstration.

- Launch your Ubuntu terminal.
- Run the command line below to ensure your Ubuntu system has all the latest updates and OpenVPN network manager upgrades.
sudo apt update && sudo apt full-upgrade -y && sudo apt install network-manager-openvpn-gnome -y

- You may be prompted to enter your system password. Do so, and press Enter.
- Go to your homepage and click the system status icons in the upper right corner.

- Toggle “Wired Connected,” then click “Wired Settings.”
- Click the “+” icon next to “VPN.”
- Choose “Import from file.”

- Open the file where the zipped elements from step 4 were extracted. It’s usually named “ovpn.”

- Select from the “ovpn_tcp” or “ovpn_udp” files. The UDP protocol is the faster OpenVPN protocol, but TCP is more stable on harsh networks. I prefer UDP for this demo.

- You might have to wait a few seconds for the files inside this folder to load. Note that each file represents a NordVPN server configured for the OpenVPN protocol.
- Once loaded, choose any file corresponding to the server you want to connect to. Then, click “Open.”
- You can follow the short guide in the “How to Get Your NordVPN Recommended OpenVPN Server?” section above to get your recommended OpenVPN server.

- Enter your NordVPN service credentials under “User name” and “Password.” These are different from your regular NordVPN login details.
- Refer to the guide under “How to Get NordVPN Service Credentials?” above to get it.

- Click “Add.”
- Toggle the grayed-out button before the server to connect to this location.

- Wait till it changes to an active color. This might be green for you, but it’s orange for me.

- Test for leaks to confirm you’re now browsing with this server’s IP address.

- Use NordVPN to watch Netflix Canada, browse CBS and CBC catalogs, prevent DDoS attacks against your Linux system, and keep your online activities private in Ubuntu.
How to Install NordVPN Browser Extensions on Ubuntu?
The NordVPN browser extension mimics the Ubuntu app by letting you access more settings and features. However, remember that the extension only protects your in-browser activities and won’t encrypt your sensitive online activities on other apps.
That said, it’s also one of the easiest ways to get NordVPN working on your Ubuntu.
So, here goes:
- You’ll need a NordVPN account if you don’t have one. Save money with these one-time NordVPN deals.
- Go to your browser’s extensions store. NordVPN has extensions for the Google Chrome, Edge, and Mozilla Firefox browsers.
- Search for “NordVPN.” I’ll use Google Chrome on Ubuntu for this guide, but the steps are similar across other supported browsers.

- Click the NordVPN extension. Please ensure you get the legitimate pick, which usually carries a verified logo.
- Click “Add to Chrome.”

- Click “Add extension” on the pop-up that shows.

- Once added, click the Chrome extensions and pin icon next to NordVPN. That ensures you’ll always have direct access to the extension.

- Next, click the NordVPN extension icon.

- A pop-up appears. Click “Log in.”
- You’re directed to the NordVPN login website page. Enter your email address, then click “Continue.”

- Enter your password, then click “Continue.”

- You’ll get a successful login message.
- Now, click the NordVPN extensions icon again.
- Click Settings > Connection.

- Enable the kill switch. Otherwise, a random connection drop may leak your DNS/IP address and online activity to your ISP, internet snoops, third-party network admins, or web servers.

- Once enabled, you’ll get a prompt showing that you need to connect to the VPN to use the internet. Ignore the message while we continue the setup.

- Click the NordVPN extension again. Go through Settings > Security and privacy.

- Toggle “Threat Protection Lite” to automatically warn you of malicious websites and block ads while browsing the web.
- Threat Protection may interfere with the basic operation of some legitimate sites. In that case, you can briefly turn it off.

- Click the NordVPN globe icon to return to the dashboard.

- Click “Quick Connect” to get the best-performing VPN server for your location, determined by NordVPN.
- Alternatively, click the dropdown icon to search for countries to connect to. I’ll connect to Spain for this example.

- Note: For countries with city servers, you can choose what city you want servers in. In this case, I’ll go with “Madrid.”

- Once connected, test for leaks. I use www.ipleak.net to ensure the VPN-assigned server is now what web servers also see.

- Unblock in-browser streaming platforms like BBC iPlayer, securely access your online banking platforms on any network and hide your internet activities from snoopy network admins.

How to Disconnect From NordVPN on Ubuntu?
How you disconnect from NordVPN on Ubuntu depends on the setup method you’ve chosen. You’re in luck since I’ve shared how to disconnect from a NordVPN server on all Ubuntu setups below.
NordVPN Ubuntu App
Since the NordVPN app is operated in the Ubuntu terminal, that’s also where you disconnect it.
Two commands work for this, as shown below:
- Go to the Ubuntu terminal.
- Run either [nordvpn d] or [nordvpn disconnect] (without the brackets).

- Your connection reverts to normal.
NordVPN OpenVPN Client
Want to disconnect from the NordVPN OpenVPN server to reconnect to another or use your regular internet connection? Do this:
- Launch the Ubuntu terminal.
- Press Ctrl + C on your keyboard.
- You’ll get command lines with comments “Closing TUN/TAP interface” and “process exiting.”

Want to be extra sure? Run an IP test to see if you still use NordVPN’s servers.
Network Manager Interface
Disconnecting from the NordVPN app via the Network Manager interface requires running no code in the terminal.
Here’s what you should do instead:
- Click the systems icon tray.
- Toggle the connected NordVPN server.
- Click “Turn Off.”

And that’s it!
How to Uninstall NordVPN on Ubuntu?
You can only uninstall the NordVPN Ubuntu app setup. For the others, you’ll have to delete the configuration files you’ve created.
Here’s how to uninstall the app:
- Open your Ubuntu terminal.
- Run the code below.
sudo apt-get --purge remove 'nordvpn*'

- Enter your Ubuntu system password, if prompted.
- Press Y, then press the Enter key.

- NordVPN is now successfully uninstalled.

For the other setups, follow this guide:
- Open your NordVPN configuration file download folder. It’s “Downloads” for me.
- Delete the OpenVPN configuration files you’ve downloaded.

- Click the system’s status icon tray.
- Click Wired Connected > Wired Settings.
- Click the settings cog next to the created NordVPN configurations.

- Click “Remove VPN.”

- Repeat this removal process for other NordVPN servers you might have configured on your Ubuntu.
How to Troubleshoot NordVPN Ubuntu Connection Issues?
You shouldn’t face too many issues if you follow the NordVPN-Ubuntu setups in this guide correctly. However, there are a few issues that could mess with your setup.
Here’s how to fix them.
Update Your System
Constantly update your Ubuntu before attempting the NordVPN app installation. Otherwise, there’s a high chance you keep running into terminal errors.
So, run the commands below before anything else to update or upgrade the system:
- Update Ubuntu:
sudo apt update
- Upgrade Ubuntu:
sudo apt upgrade
Get NordVPN Service Credentials
The OpenVPN and Network Manager setups won’t work without the NordVPN service credentials. Not even if you use your account username and password logins.
Before attempting these setups, ensure you’ve gotten the relevant credentials.
Thankfully, there’s a straightforward guide to help you above.
Speak With Customer Support
NordVPN customer support knows their app and platform inside out.
That’s why you should contact them if you’re ever stuck at any setup stage or need to request related assistance.
Remember that you’re a paying customer, and the 24/7 live chat is a part of the value you paid for.
FAQs
Does NordVPN Offer Split Tunneling on Ubuntu?
NordVPN doesn’t offer app-based split tunneling on its Ubuntu app or alternative setups. However, you can enjoy its website-based split tunneling via the Ubuntu browser extension to exclude some websites from the VPN tunnel.
That said, experienced Ubuntu users with a deep understanding of network routing and how Ubuntu iptables work can configure NordVPN split tunneling on the operating system.
Enjoy NordVPN on Your Ubuntu
There are a lot of NordVPN-Ubuntu guides that don’t work.
That’s mainly because they’re outdated, weren’t tested with the right systems, or were missing some crucial steps.
But with the steps above, you can successfully set up the NordVPN-Ubuntu app with all the VPN’s features or configure its OpenVPN client successfully.
Alternatively, there’s the Network Manager setup that improves on the OpenVPN client.
The best part? These one-time NordVPN deals help you save on an account that works for ALL these setups.


