Are you one of those players who skip the dialogue and cut scenes?
Here’s the TL;DR version – but be warned, you’ll still need to read the rest of this guide if you want to get it right the first time.
Find a VPN with Russian servers, fast speeds, and low latency. My top pick for the Best VPN for Lost Ark is Surfshark.
Purchase a subscription, download the VPN app, and install the software.
Image for illustration only. Design, deals, and details may differ. Click on the image for current info.
Log into your VPN account and connect to a VPN server in Russia.
Get a Russian email account (such as Mail.ru).
Register for Lost Ark from the official website (it’s in Russian, so use Google Chrome’s auto-translate or a plug-in – unless you can read Russian).
Download and install Lost Ark.
Launch Lost Ark to make sure it works.
If you can read Russian, then you’re good to go! If not, download and apply an English Translation Patch.
Chances are you aren’t in the mood for learning Russian (which will probably take so long you might as well wait for an official English launch) or having a dodgy “patch” infect your computer.
But don’t worry! This won’t be an obvious “Press W to move forward”-type tutorial!
How to Play Lost Ark from Anywhere in the World?
Are you ready to take on Kazeros and his six demonic legions in the world of Lost Ark? By the end of this guide, you will be!
Step 1: Finding a VPN
As I mentioned in the “Skip Dialogue” TL;DR version, you need a VPN with Russian servers to play Lost Ark.
This is because – unless you have a valid South Korean mobile phone number registered with one of the country’s four telecom providers – the South Korean version is off-limits.
Virtual numbers aren’t accepted, either.
Likewise, the Japanese version is currently only available to a limited number of players who had to apply (and be accepted) for closed-beta access.
In my experience, Surfshark works best. It’s the most affordable of the three (ProtonVPN Plus costs nearly four times as much) and the fastest (nearly twice as fast as CyberGhost).
Step 2: Purchase a Subscription and Install the VPN App
This is the easy part.
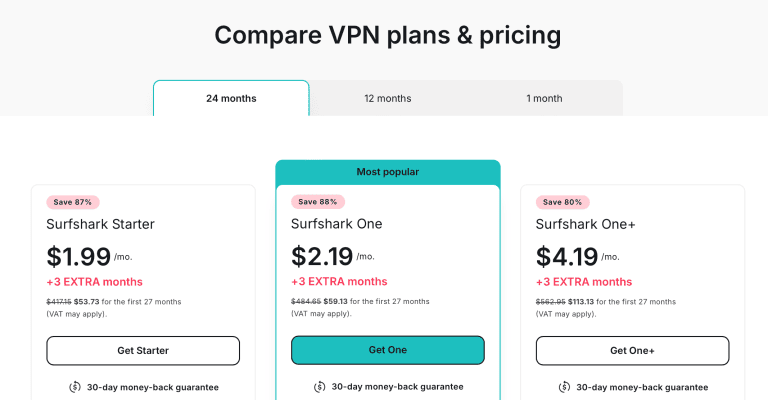
Assuming you decide to go with Surfshark, you can use this link to get an exclusive discount off their Two-Year Subscription Plan!
Image for illustration only. Design, deals, and details may differ. Click on the image for current info.
Just hit the big red button that says “Buy Now,” enter your email address, and select a payment option. Surfshark accepts:
Credit Cards (MasterCard, Visa, AMEX, and Discover)
PayPal
Amazon Pay
Cryptocurrency (Bitcoin, Ethereum, and XRP Ripple)
The payment options available to you might differ slightly depending on where you live.
After hitting the “Complete purchase” button, install the Surfshark Windows App.
Lost Ark is only available for Windows now, so if you’re using Linux on your gaming rig for whatever reason, you’ll need to install Windows on a Virtual Machine (or dual boot) to play.
The same is true for anyone duped into buying a Mac to game on (it’s not impossible, just highly impractical).
Though it’s worth mentioning, Surfshark also has apps for Linux (Ubuntu and Debian) and Mac, so you can still stay safe online while you aren’t gaming.
You can even connect unlimited multiple devices with a single Surfshark account.
Step 3: Connect to a VPN Server
Once you finish installing your VPN app (it should only take 1-5 minutes from clicking “Download” – no restart necessary), launch the app and log into your user account.
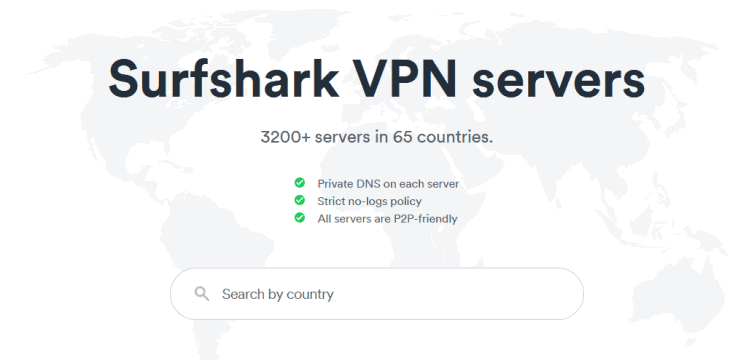
To play Lost Ark, you won’t be using Surfshark’s Quick Connect button, as it connects you to the nearest, fastest server in the provider’s 3,200+ server network.
Instead, open the Settings and click on Connectivity. Toggle the Kill Switch to the right.
Now, if your connection to the Surfshark VPN server is interrupted, the Kill Switch will stop your real IP from being leaked.
So far, Smilegate doesn’t appear to ban players who use VPNs to change their IP address, but the Russians might have something to say about it.
For that same reason, consider using NoBorders Mode too. This is an obfuscation feature that hides the fact you’re using a VPN at all. Surfshark makes it dead easy to use too.
Just make sure you’re using the OpenVPN protocol by checking Settings > Advanced and choosing OpenVPN UDP or OpenVPN TCP under Protocols (UDP is the faster of the two).
All that’s left to do is open the Locations menu on the app’s main screen and click on a Russian server to connect!
Step 4: Create a Free Mail.Ru Address
Next, you need a Russian email address, so head to Mail.ru.
Unless you can read Russian, I suggest using Google Chrome so you can take advantage of the built-in auto-translate feature or installing the To Google Translate plug-in for Firefox.
Now you can understand what you’re doing when you click Create mail in the top-left.
Don’t panic when you see the next screen asking for a phone number: you can use a virtual number from any country.
However, if you use a free temporary number from a public website, it might take a while to find one that works.
I recommend getting a temporary free or paid virtual number from a service like GoogleVoice or Hushed. This will come in handy for more than just playing Lost Ark.
Next, put in a name and date of birth. It doesn’t have to be your real details (in fact, I suggest using fake info – just remember to make a note of it, so you don’t forget).
Finally, choose an email account name and password and hit the Create button.
You can also decide whether you want to “Specify a backup mailbox.” This is handy if you forget your mail.ru login details, but again – use a fake one.
ProtonMail lets you create a free encrypted email address – you can always specify your real email as the backup for that one.
After being entranced by the trailer playing in the background, click the big button that reads “Play For Free.”
Alternatively, be a rebel by clicking “Register Now” in the top-right corner – it has the same result: to open a pop-up window.
Next, select the mail.ru icon in the lower-left corner.
Enter your mail.ru address and password.
The next screen just asks you to click the big orange button that says “Proceed.”
You’re almost there! Now you need to complete the final registration steps by clicking “I accept the Terms…” and then “Register Now.”
Step 6: Install Lost Ark & MY.GAMES GameCenter
You should now be redirected to the main page for Lost Ark Russia. Click the “DOWN-LOAD A GAME” button in the upper right corner.
Before you can start rampaging through Akrasia, slaughtering Kazeros’s minions on your quest to gather the missing piece of the Lost Ark, you need to download and install Lost Ark and the MY.GAMES GameCenter.
Yes, I hate having to use game launch platforms other than Steam as much as you do. But if you want to play Lost Ark, you’ll have to suck it up for now.
Luckily, the platform is installed automatically when you install Lost Ark.
Step 7: Download and Launch Lost Ark
When the MY.GAMES GameCenter is done setting up, Lost Ark should install automatically.
There are nearly 50GB, so depending on your internet speed, you might want to find something to do offline for about an hour or so.
Once it’s done, launch the game.
Yes, in Russian. You want to make sure the game loads and runs properly, after all!
Step 8: Download and Apply the English Translation Patch
Assuming you didn’t miraculously learn fluent Russian while waiting for Lost Ark to finish downloading and installing, it’s time to get a fan-made English Translation Patch.
They give detailed instructions together with the direct download link, but here’s the short version, so you know what to expect:
Download and unpack the “zip” file.
Open the exe (remember to Run as Administrator).
Choose the Russian server and select “English” to apply the patch, and then minimize the window.
Launch Lost Ark through the GAMES Game Center.
Remember to keep the patch and your VPN connected while playing. When you’re done, make sure “Restore original on close” is marked in the patcher before logging out of the game.
Close Lost Ark, Game Center, and LaoTranslation in that order.
With the help of Surfshark (grab a discount), you can play Lost Ark from anywhere in the world! Now all that’s left to do is go through the in-game tutorial and enjoy the game.
Just make sure to connect to a Russian Surfshark VPN server before launching the Game Center and to only disconnect after you close everything else.
Protect private web traffic from snooping, interference, and censorship. All plans are covered by a no-hassle 100% money-back guarantee for your first 30 days of service.
Bram Jansen is a renowned expert in the field of cyberspace, with a wealth of knowledge and experience in online security and VPN technology. His lifelong fascination with the virtual world began with his love for science fiction, and he has spent his career exploring the intersection of technology and online security. He works with a team of experts to provide unbiased and accurate information to consumers worldwide.