You can set up and use Surfshark in Canada by downloading and installing its native apps on your preferred device. Luckily, the VPN is compatible with Windows, Android, Mac, iOS, gaming consoles, and Smart TVs, so you won’t be limited by your device’s OS.
Afterward, launch the VPN app on your device, log in, and connect to a preferred server to enjoy secure internet freedom and content unblocking in Canada.
Of course, there are unique settings to tweak for each device type.
But don’t worry! I’ll provide detailed instructions to help you understand better.
How to Set Up Surfshark in Canada?
Surfshark VPN offers native Android, Windows, Mac, and iOS apps.
In the next section, I’ve explained how to set up the VPN on various devices in Canada.
How to Set Up Surfshark on PC (Windows & Mac) in Canada?
Follow the steps below to set up and use Surfshark VPN on your PC.
I’ll use Windows PC for this example, but the procedure is similar for Mac users:
- Subscribe to Surfshark. Grab these Surfshark hot deals and save BIG!
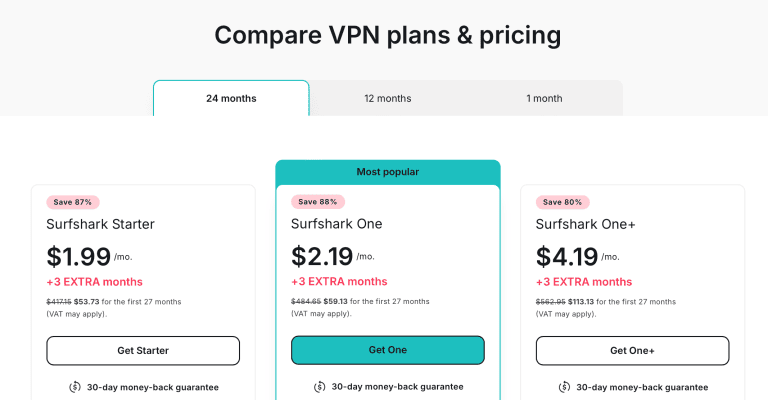
- After paying for a plan, visit Surfshark’s website and click “VPN download.”

- Click your device’s icon from the prompted device options. I’ll choose Windows for my demonstration.

- Tap “Download the Windows App” to initiate the download process.

- Go to “Downloads” on your PC and click the downloaded file.

- Follow the prompted on-screen instructions to install the Surfshark VPN app.

- Launch the VPN app and sign in using your account credentials (email and password) from Step 1.

- Enable the VPN kill switch to prevent IP leaks on random VPN connection drops. Go to Settings > VPN settings > Kill Switch.

- Choose a suitable VPN protocol. Go to Settings > VPN settings > Protocol.

- Click the “Quick-connect” button to connect to the nearest and fastest available server. Or use the search bar to find your desired server.

- Test for IP/DNS leaks. My test returned an IP address from the server location I selected in step 10, meaning my IP wasn’t leaking.

- Enjoy secure and seamless access to international Netflix libraries on your PC in Canada!

How to Set Up Surfshark on Mobile Phone (iOS & Android) in Canada?
You can use Surfshark on your smartphone by downloading and installing the VPN app from Google Play Store (Android) or App Store (iOS).
In other words, do this:
- Purchase a preferred Surfshark VPN subscription plan. Cut costs with these fantastic discounts!
- Launch Google Play Store or App Store. I’ll use an Android phone to demonstrate this example.

- Type “Surfshark” in the search bar.

- Tap “Install.”

- Launch the VPN app and tap “Log in.”

- Sign in with your account details.

- Enable the kill switch. Go to Settings > VPN settings and toggle “VPN Kill Switch.”

- Go through Settings > VPN settings > Protocol to choose a suitable one. I recommend WireGuard (good performance and fast speed).

- Navigate to “VPN,” then tap “Quick-connect” to connect automatically to the nearest and fastest available server. Alternatively, tap “Locations” and use the VPN search bar to find your preferred server.

- Conduct an IP/DNS Leak test, ensuring you’re assigned a new IP address based on your VPN server location from Step 9.

- Browse the internet anonymously and unblock streaming services on your mobile without fear of copyright trolls, government authorities, ISPs like Bell, Shaw, and Rogers, or other third-party snoops!
How to Set Up Surfshark on Smart TVs in Canada?
You can enjoy secure internet freedom on your Android Smart TV in Canada by downloading and installing the Surfshark VPN app using the setup procedure explained above.
For non-Android Smart TV devices which don’t support native VPN apps, you can use alternative methods like the Router setup, a streaming device running the Surfshark app, or Virtual router via your Windows PC.
I’ll explain all three options below.
Router Setup:
Installing Surfshark on your router protects all devices connected to that network, including your Smart TV. But before that, confirm if your router is VPN compatible:

If so, follow the steps in the videos below to set up your Smart TV with Surfshark in Canada:

Also, here’s the VPN client guideline video for a DD-WRT router:
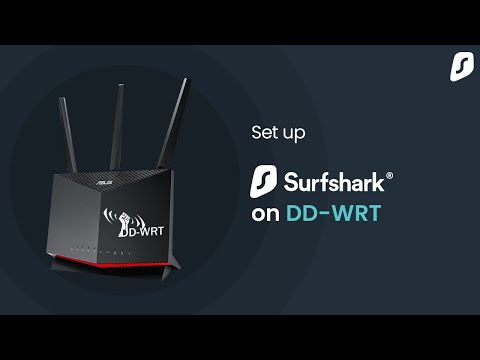
Once done, connect your Smart TV to the router to enjoy secure content unblocking and streaming.
If your router doesn’t support VPNs, you can still get Surfshark onto your Smart TV in Canada by plugging in a streaming device that runs the app.
Streaming Device Setup:
Surfshark discontinued its Smart DNS service in February 2026, so the DNS steps that used to be here no longer work. The quickest way to watch Hulu, Netflix US, Amazon Prime Video, Disney+, or another US streaming service on a non-Android TV in Canada is now a Fire TV Stick, a Google TV device, or an Apple TV on tvOS 17 or later, since each one runs the Surfshark app.
- Plug the streaming device into your TV’s HDMI port and connect it to your Wi-Fi.
- Open its app store (Amazon Appstore, Google Play, or the App Store on Apple TV) and search for “Surfshark.”
- Install the app, then log in with your email and password. Or choose the login code, then type the code shown on your TV into any logged-in Surfshark app under Settings > My account > Enter login code.

- Connect to a US server, such as New York, for American libraries.
- That’s it! Open your streaming app and enjoy secure and unrestricted content unblocking in Canada.
Rather not add another box? NordVPN still offers SmartDNS for TVs without a VPN app; my NordVPN SmartDNS guide has the steps, or check NordVPN’s latest deal.
Virtual Router on Your Windows PC:
You can also set up a virtual router via your Windows PC and hotspot your Smart TV to share the VPN connection. First switch the Surfshark app to OpenVPN (UDP) under Settings > VPN settings > Protocol, as the hotspot share needs it. Then, in Windows’ Network Connections, share the “Data Channel Offload for Surfshark” (DCO) adapter with your hotspot. The 2021 video below covers the remaining steps; where its adapter name differs, choose the DCO adapter.

How to Set Up Surfshark on Gaming Consoles in Canada?
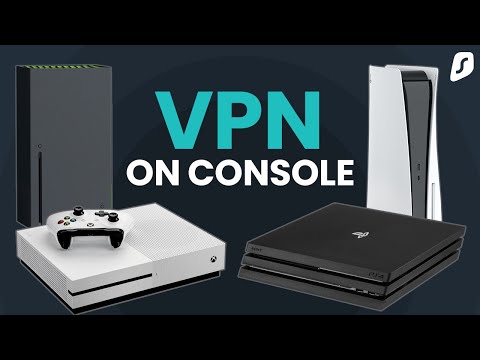
Like non-Android Smart TVs, gaming consoles have no VPN apps.
But as we did for Smart TVs, you can set up Surfshark in Canada on your gaming consoles using the router and Windows PC virtual WiFi Hotspot methods.
Here’s a video on accomplishing the two methods:
Surfshark’s own console guides add a wired option, too.
Switch the Surfshark app on a Windows PC to OpenVPN (UDP), link the console with an Ethernet cable, and share the DCO adapter with that Ethernet port to pass the VPN connection to your PlayStation or Xbox.
How to Get a Canadian IP Address With Surfshark?
Getting a Canadian IP address is necessary to secure your internet connection while enjoying seamless access to Crave TV shows, Rogers NFL Live, plus other local Canadian content.
You can get a Canadian IP address with Surshark in simple steps:
- Launch the Surfshark VPN app.
- Select an appropriate Surfshark protocol for Canada. Go to Settings > VPN settings > Protocol.
- Return to the VPN page and type “Canada” in the search bar.
- Click one of the available Canadian server locations (Vancouver, Toronto, and Montreal).

- Conduct an IP/DNS leak test to check your IP. My IP leak test confirmed I was assigned a Canadian IP address.

- Enjoy your Canadian IP address to securely access RBC, CIBC, and other local streaming services.
What’s the Best Surfshark Server for Canada?
Surfshark offers 4,500+ servers in 100 countries, including 100+ servers in three Canadian cities. So, you have a wide choice of servers to stay safe against privacy invasions from online snoops, copyright trolls, ISPs like Telus or Bell, or public WiFi admins.
However, you must pick specific servers offering a seamless experience for streaming, gaming, privacy, torrenting, or other activities in Canada.
For instance, Canada – Vancouver was my best Surfshark torrenting server since it’s the nearest, offering fast torrent download speeds. Toronto and Montreal servers are other promising torrenting Surfshark servers in Canada.
Speaking of streaming, the Surfshark servers in the three Canadian cities (Vancouver, Toronto, and Montreal) performed exceptionally in unblocking local services like Netflix Canada, Crave TV, Showcase, etc.

However, to unblock international streaming services, use the following:
- New York server for US-based streaming services like Hulu, Netflix US, etc.
- London server for UK-based streaming services like BBC iPlayer.
- France server for France TV.
- Norway server for NRK.
Which Surfshark Protocol Is Best to Use in Canada?
As confirmed by its support agents, the Surfshark WireGuard protocol is the best to use in Canada.

To verify, I tested WireGuard against other Surfshark protocols, using my 30 Mbps base connection over a Canada Vancouver server.
Here are my speed drop results for each protocol:
| Surfshark Protocol | Speed Drop |
|---|---|
| WireGuard | 3.54 Mbps |
| IKEv2 | 5.67 Mpbs |
| OpenVPN (UDP) | 7.09 Mbps |
| OpenVPN (TCP) | 10.23 Mbps |
Frequently Asked Questions (FAQs)
Does Surfshark Offer Dedicated IPs in Canada?
No, Surfshark doesn’t have Dedicated IPs in Canada.
Instead, at an additional monthly fee, you get Surfshark Dedicated IP addresses in the UK – London, United States – Los Angeles, Germany – Frankfurt, and the Netherlands – Amsterdam.
Enjoy Seamless Content Unblocking and Tight Security in Canada!
Surfshark is an impressive Canada VPN with impeccable content unblocking abilities, fast connection speeds, and top-tier privacy and security features over 4,500+ servers in 100 countries.
Even better, Surfshark offers cost-effective subscription plans coupled with unlimited simultaneous connections. So, you won’t incur extra costs to secure as many devices as you wish in Canada.
Interested? Grab my Surfshark time-limited deals to get started now!